You might have a stuck switch in your Touchplate low voltage system if something that is ON stays ON indefinitely, or if something that is OFF permanently stays OFF. To learn how to fix a stuck momentary switch, first troubleshoot your wiring system by checking the transverter to ensure the appropriate voltage is being output from your low volt system.
If you are suddenly unable to turn on or off any of your lights in your Touch Plate system, a stuck switch may be the cause.
Switches can get stuck in a couple of ways. One, the switch physically is jammed or two, the contacts have fused together. When this happens, the transverter is continually putting current through the last relay that was switched on or off thereby preventing it from switching any of the other relays.
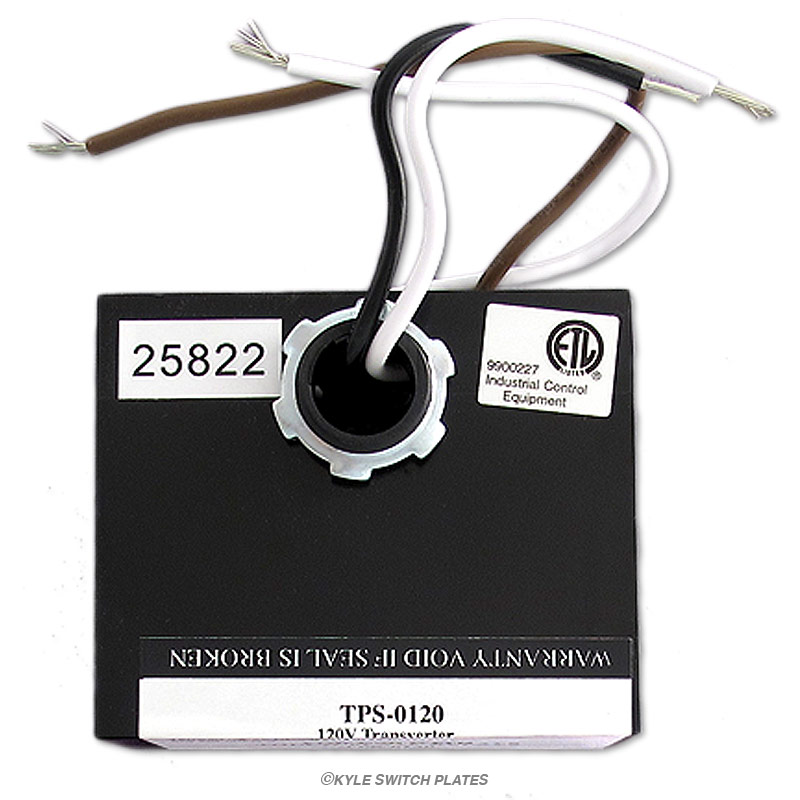
The transverter (TPS-0120 or TVR-1) and the relay that has the stuck switch will most likely feel warm to the touch.
 Please Note: Perform the following at your own risk. Although shock is not likely because the low voltage side of the transverter (the side with the two thinner wires) is only about 30 volts DC, nevertheless it is not impossible. If you are unsure whether dangerous high voltages are present, then contact an electrician to perform these tests for you. You should be able to use a simple voltmeter or multimeter to test for the presence of high voltages. Be sure to check for high voltages using both AC and DC modes.
 If you suspect that one of your Touch-Plate low voltage switches is defective, first test your transverter power supply to see if the appropriate voltage is being output. Check your transverter by going to the relay panel where the transverter in your system is housed.
 If the transverter feels warm or hot to the touch, you have a stuck switch. When operating normally, the system should be outputting 28 to 31 VDC with nothing connected. If the voltage output is 0.1 to 5.0 VDC with the wires connected, a stuck switch is holding the circuit closed and the transverter has lowered its voltage output as a protective measure against burning the relay coil. With this, the defective (stuck) switch will have to be replaced or fixed. If the voltage reads 0 VDC, the transverter is dead needs to be replaced.
 If your transverter has a normal output of 28 to 31 VDC and your system is still not functioning properly, you could have an internal wiring problem. Something could be disconnected (loose wires) or a wire may have been improperly reconnected after changing a component. Please refer to a licensed electrician for further assistance with these issues involving your inside wiring. You should consider replacing your transverter if the voltage output is between 5 VDC and 28 VDC. The transverter must be replaced if the readout is 0 VDC. Touch-Plate's latest 120V transformer model, TPS-0120, directly replaces the discontinued Touch-Plate TVR-1 transverter as well as the older 17C converter and 78K1 transformer combination power supplies.
 We highly recommend consulting a licensed electrician for help if you have any reservations about performing the troubleshooting steps above, or if you are concerned about the presence of dangerous voltages. This troubleshooting advice is limited to Class 2 low voltage wires only; for your safety, please DO NOT attempt to troubleshoot any high voltage wiring.
To find the relay with the stuck switch, first disconnect the switch common wire on the low voltage side of the trransverter (labeled "switch). Remove the nut and disconnect the bundle of wires coming from the switches. Systematically tap the wires from the switches one at a time to the transverter's "switch" wire. You should see one of your lights turning on and off each time you tap the wires together.
The common wire that contains the stuck load (malfunctioning switch) will cause the relay to click when it is touched to the transverter. When you find the relay, it should be warm or hot if it has not been too long since the connection at the transverter was broken. If you disconnect this relay on its low voltage side (either of the two low voltage wires), your system should be freed up, allowing you to control the rest of your lights. If you still cannot, check the voltage at the transverter (low voltage side). If it is about 30V DC, then it probably needs to be replaced. If it is about 3V DC, then you probably have another stuck switch, or you have disconnected the wrong relay and you should repeat the above procedure.
Disconnect the problem switch or switches that control the light that has been stuck ON or OFF. IMPORTANT SAFETY NOTE: As switches are disconnected, be sure to prevent the resulting bare wire ends from touching.
If you have replacement switches, wire them into plate and attach the lighting units to the wall.
After disconnecting any problematic switches, reconnect all of the low voltage common wires to the "switch" wire of the transverter (opposite of what you did in Step 2). As wires are connected, no relay clicking sounds should occur.
Once a stuck switch has been removed from the system, it's important to ensure the transverter is still putting out proper voltage. Check the transverter output with a voltage meter. The minimum output for a properly functioning system is 28.5 VDC. If the transverter reads a lower output, replace the transverter. If the output reads between 0.1 and 5.0 VDC, the stuck switch has not been properly location and removed. There could be a switch controlling the room light that was missed when the others were dicsconnected. Or, there may be another stuck switch in the system. Go back and repeat all steps until you get the correct reading from the transverter (28.5 VDC minimum).
Theory of Operation: The transverter is at rest most of the time. Its "at rest" voltage is about 28-30 volts DC. When a button is held down, the relay switches, and the transverter's voltage drops to about 3 volts DC until the button is released. This can be simulated with a working system: just hold down one button, then, about a second later, with the button still held down, try pressing another button. It shouldn't work until the first button is released. The troubleshooting procedure above works because the two bare wire ends become the "switch", since the stuck switch is not just a constant electrical path.
1. Check output voltage (will read 0.1 - 5.0 VDC if there is a stuck switch).
2. Disconnect the low voltage "switch" common wire from the transverter.
3. Remove wire nut and unbundle all wires.
4. One by one, momentarily touch wires from each switch to the transverter's "switch" common wire, listening for a clicking sound upon one of the connections.
5. Follow the clicking sound, and disconnect one low voltage wire on the relay that is clicking.
6. If the lights work now, find and replace the stuck switch(es).
7. If the lights still do not switch: check the voltage across the low voltage side of the transverter. If it is about 0 VDC, you need to replace the transverter. If the voltage is between .01 & 5.0 VDC, you still have a stuck switch somewhere in the system.