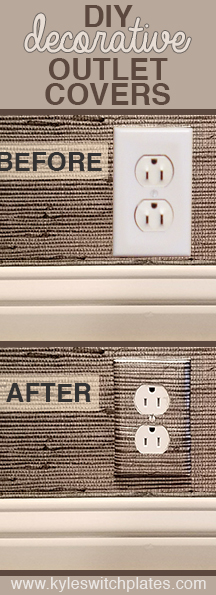
Step-by-Step Directions for Making Decorative Paper Covered Light Switch Plates
By Kyle McKeown Mansfield
Create unique switchplates with a professional-looking finish using these easy-to-follow photos and instructions for decoupage.
This fun craft is a wonderful way to add style and charm to any room. Use wallpaper to match your walls or use brightly designed scrapbook paper to make a switch plate that will stand out.
Here's how to get started:
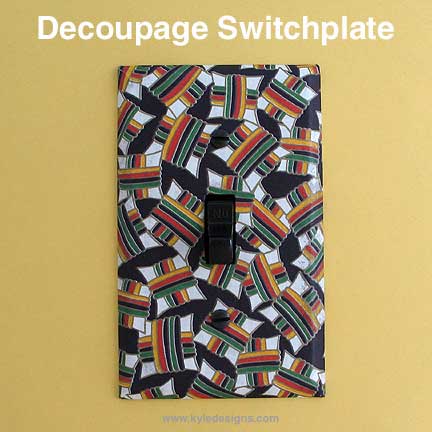
Supplies Needed: Varnish, decorative papers or photos, plain light switchplate cover, scissors, brush, Xacto knife or small boxcutter, wax paper. A metal switchplate with straight edges is recommended because it provides a rigid surface that will not flex; straight sides provide a crisp edge for folding and covering corners. Avoid plates with a rounded surface or curved edges as these are more difficult to work with and may cause the paper to wrinkle.
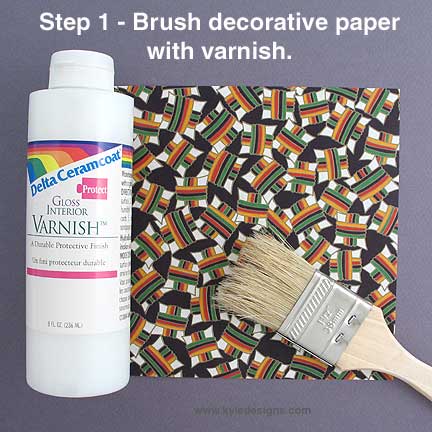
Step 1: Varnish the Paper - Trim a piece of decorative paper roughly 3/4" larger in each direction than the switchplate you intend to cover. Working on a piece of wax paper, paint the surface of it with varnish and allow to dry.
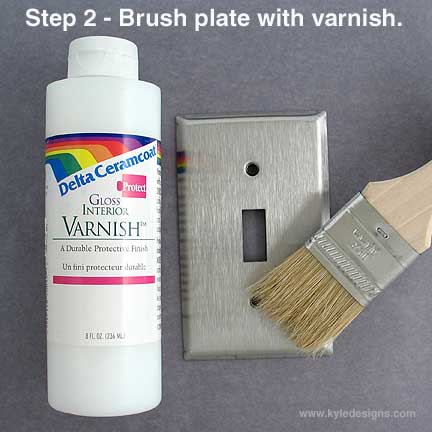
Step 2: Varnish the Switchplate - Brush the surface of the switch plate cover with an even coating of varnish. Here we are using a stainless steel 1 toggle cover but any size or finish is fine as long as your surface is clean.
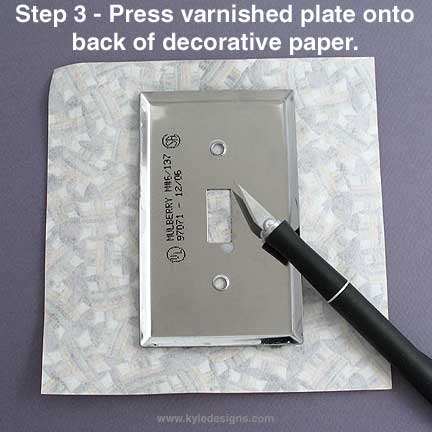
Step 3: Press Paper to Switchplate - Working on a hard surface, lay the switchplate on top of the back side of the decorative paper and press. Flip over and gently smooth the surface with fingers, or with a brayer if you have one, working from the center to the edges, pressing out any wrinkles or bubbles.
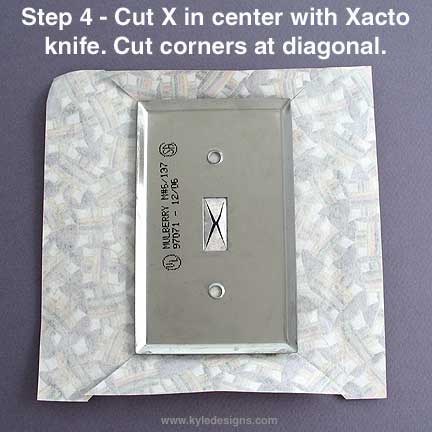
Step 4: Cut Corners and Center - Using the Xacto knife or boxcutter, make a diagonal cut out from each outside corner, cutting in slightly behind switchplate - this is where the paper will slightly overlap when folded back. For the centers, cut an "X" in the center opening for a toggle switch. If working on an outlet, making more cross cuts (like cutting a pizza) will create a smoother edge when folded to the back. On a large Decora style opening, you may need an extra cut at the corners as well - any area with a slightly rounded edge will require more cuts so that smaller sections can be folded back.
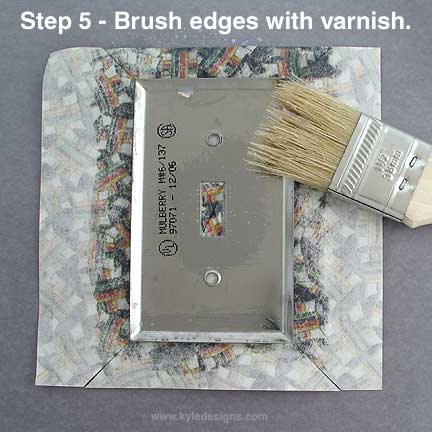
Step 5: Fold Over Edges - Working from the back of the switchplate, add more varnish to the edges and center, then fold back the center wedges of paper and press into place. They should stick immediately. Next, press two opposite sides over and into place.
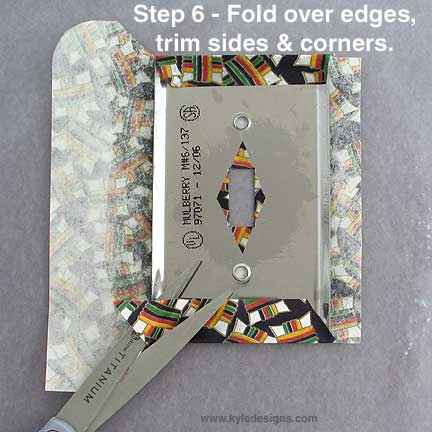
Step 6: Trim Corners - Using scissors, trim back corners at the edges of the two sides pressed into place.
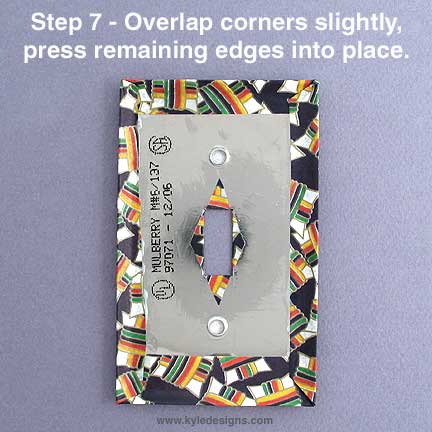
Step 7: Finishing Step - Press remaining two sides up against edges of plate, slightly overlapping corners on the front. Cut back paper at a slight angle from corners and press into place, making sure you have crisp, smooth edges with no gaps or wrinkles.
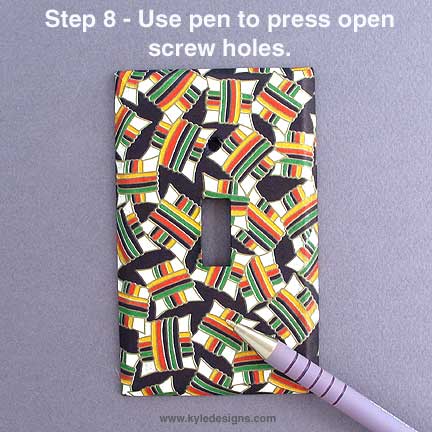
Step 8: Open Screw Holes - Working from the front of the switch plate, cut a tiny "X" at the screw holes with the Xacto knife. Then, using a pen or pencil, push the hole open. The conical shape of the pen will neatly press the paper into place. Allow to dry. That's it! You're done!
![]() Easy Craft for Kids - Kids can easily create their own decorative papers for a switchplate. Just give them an outline, lightly marking the locations of edges, openings and screw holes, and have them color it in with their own scene or pattern.
Easy Craft for Kids - Kids can easily create their own decorative papers for a switchplate. Just give them an outline, lightly marking the locations of edges, openings and screw holes, and have them color it in with their own scene or pattern.
![]() Tip: Spray Varnish - You can skip step one and begin with dry paper if you wish. Optionally spray the finished plate later with varnish if you wish to protect the surface.
Tip: Spray Varnish - You can skip step one and begin with dry paper if you wish. Optionally spray the finished plate later with varnish if you wish to protect the surface.
![]() Tip: Paper Choices - Precut origami paper is often the perfect size for single and double switchplates. Packages of beautiful papers can usually be found at arts and crafts supply stores. Photographs (or photocopies of them), magazine pages and other scrapbooking papers also work well.
Tip: Paper Choices - Precut origami paper is often the perfect size for single and double switchplates. Packages of beautiful papers can usually be found at arts and crafts supply stores. Photographs (or photocopies of them), magazine pages and other scrapbooking papers also work well. ![]() Tip: Embellishments - Once the switchplate is covered with one sheet of paper, you can easily add other elements to embellish the plate further. Decoupage the surface with additional photos, thin stripes of paper or with die cuts using more varnish. You can easily add rhinestones along edges or in pretty clusters to create instant sparkle. Add a fringed border of beads along the bottom for an even fancier look.
Tip: Embellishments - Once the switchplate is covered with one sheet of paper, you can easily add other elements to embellish the plate further. Decoupage the surface with additional photos, thin stripes of paper or with die cuts using more varnish. You can easily add rhinestones along edges or in pretty clusters to create instant sparkle. Add a fringed border of beads along the bottom for an even fancier look.
See Kyle Design decorative switch plates if you are looking for interesting finishing touches for your wall.
